Saturday, January 30, 2010

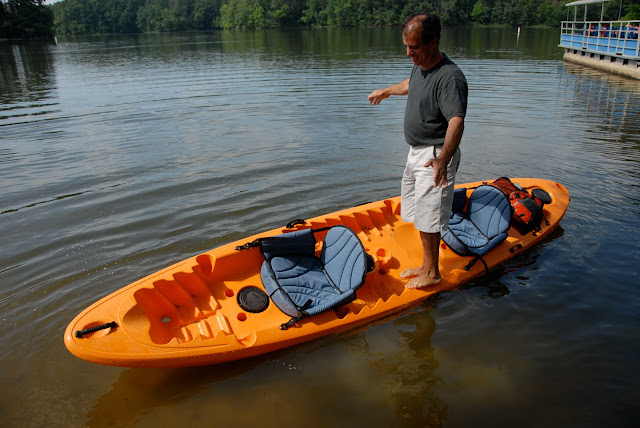
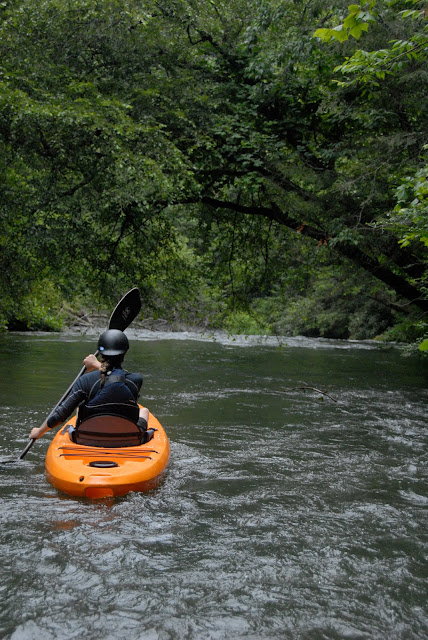
Kayak Sledding in the Liquidlogic Deuce Coupe.

We got 6- 8" of snow at the Liquidlogic factory and I was just thinking this thing would be fun out there in the snow. The Washington Park neighborhood of Winston Salem has lots of good sledding and Doune St. was the epicenter. The Deuce Coupe was the vehicle of choice.

Here is the link.
or
Check it out here.
Shane

Monday, January 25, 2010

Bad Ass Outfitting by Liquidlogic Kayaks


We have had Bad Ass Outfitting in our kayaks for a quite a while now and the feedback has been phenomenal. It used to be that people just raved about the boats but now as much or more than any other feature people comment on the outfitting. I wanted to write a story about the outfitting because there are a couple questions that people ask that I would like to cover. While I am at it I'll just cover everything about the outfitting. If you have any questions let'em fly in the comments section.

Bad Ass Outfitting came out of a desire to make a seat for a kayak that would give you complete control, and total comfort. The idea came from looking at race car seats. They are one body contoured seat that keeps the driver in a performance driving position but is also comfortable enough that they can be in their cars for hours at a time. Other parts that we worked really hard on were making the outfitting easy to adjust and durable enough to take a beating. Because kayakers are impatient, and tough on their gear.

This whole presentation is done in a video at the bottom of the page or Click Here.

For those of your that like browning and stuff like that make sure to check the video at the bottom of the page. It is not LL condoned, it is ill advised, slightly profane, and somewhat hilarious and entertaining.

Bad Ass Outfitting in all its glory.


The picture above is to show the contoured seat, back band, and hip pad sections all combined together to give you completely outfitted feel with no gaps or openings that leave you wishing for more. The materials that we use in this outfitting are used in the auto industry because of their durability, UV resistance, draining properties, and comfort against the skin. The facing material is a spacer mesh that is very UV resistant. You can leave this material out in the sun and it won't break down or fade. The inside material which you can see in the photo below is a thicker 3 dimensional spacer mesh that gives it more cushioning properties. The seat cover itself has the facing material and a layer of the 3D spacer mesh sewn into it, add that to another layer of 3D spacer mesh on the backband and you have a very cush ride.

The Main Points for Bad Ass Outfitting Materials.
  • All one contour padded construction
  • UV resistant facing material
  • Quick draining mesh construction
  • Anti-microbial material, lets just say "less paddler stench" :)
  • Durability you can't rip, or tear this stuff.

Quick Access to the Back of your boat.


One of the largest issues that people bring up or try to sell against LL boats with the Bad Ass Outfitting is the ability to get into the back of our boats. What I want to do now is show you several options on how to get into the back of the boat. I think everyone will find once they know how to get in the stern of a Liquidlogic boat you will see that its easy. First thing as you can see in the above photo is that you take the back off the back band. It's held there by a hook and loop material.

Access to the back of your Liquidlogic kayak.

The Full Access Option
  1. Pull the back of the seat pad off the back band.
  2. Release the ratchets until the back band is all the way to the back of the cockpit rim.
  3. Lift the back band up and onto the back of the cockpit rim while continuing to release the ratchet. Presto magico, all the access you will ever need.

Quick Access Option

The Quick Access Option
  1. Push the back band back a couple inches.
  2. Push down and towards the front of the boat on the backband.
  3. It will fold down flat on the seat for access. A little forceful but quick.

The Easiest Option

The Easiest Option
  1. Pull the back of the seat pad off the back band.
  2. Loosen the ratchet all the way on one side of the backband.
  3. Pull the loosened side up and slide gear in under the back band.
  4. This is a quick an easy way to get access to one side of the stern.

Hip Pad Compartment

The other part of this whole system that is very cool is the ease with which you can adjust and place your hip pads just where you want them. The hip pad compartment is easily opened by pulling the material from the cockpit rim. It opens a pocket that takes the hip pads and shims to create a proper fit. One nice trick to placing them in exactly the position you would like them is using a piece of paper, index card, or post card from Grandma as a spacer behind the hip pad so it won't stick in place while you are trying to locate your pad. Then once it feels like its in the right place just pull the paper out and the pad sticks where you want it. This allows you to place your hip pads exactly where you want them while you are sitting in the boat.

The Paper Trick for locating your hip pad is easy to do while sitting in the boat

Hip Pad in place. Now just close the compartment.


The thigh braces are easily adjusted with just a couple turns of the screws under the outside edge of the cockpit rim next to the thigh braces. There are two screws that control the thighbraces so loosen each of them a couple turns. Then just move them where you would like and retighten the screws. This will give you more control over the feel of the thighbraces.


Important
Loosen the screws just a couple turns if you loosen more you may take the screw all the way out of its threaded nut and that can be hard to fix.


The seat is also adjustable with a couple turns of the screws next to the seat. There is a screw on either side of the boat so make sure that you loosen both of those a couple turns then just move the seat where you want it, and retighten the screws.


Important
Loosen the screws just a couple turns if you loosen more you may take the screw all the way out of its threaded nut and that can be hard to fix.


Here is a video that Woody put together covering the same things. There is more information on this video and its great to see the adjustments done in the video.

Woody Callaway talking about Bad Ass Outfitting


The below video is not condoned or approved by Liquidlogic :) However it is funny. There is poor behavior and some bad language but you gotta love the energy. Like I said don't watch it.
Fred Gnarquist talking about the Bad Ass Outfitting from a "younger" point of view.


Please leave any comments or questions below in the comments and I will answer them.
Thanks
Shane

Friday, January 22, 2010

Liquidlogic Remix XP on the Grand Canyon

Woody went out to the wild wild west to do a self support trip on the Colorado River in the Grand Canyon with a big group of folks. The craft of choice was the Remix XP 9 &10. Thanks for this awesome first video from the trip goes to Will Lyons who did all the videoing and John Grace and Chelsea for putting together a great new resource for kayak campers. Campingbykayak.com

There will more updates on this trip and kayak camping coming soon!
Here is link to a great story done by Ted Keyes on the Canyon trip Click Here

This makes me want to it do next year!
Check it out!
Shane


Tuesday, January 19, 2010

Cross Over Sit-On-Top kayak: The Coupe by Liquidlogic


Hey Everybody I had a trip this summer where I paddled with Sarah Bell from Green River Adventures on the Upper Section of the Green river in the Liquidlogic Coupe sit-on-top. I took a bunch of photos and video so I figured now that the boat is out on the market I would put up the shots that I got as well as Sarah's thoughts on the trip.


Trip Report
8/09
1st Trip in the Coupe on the Upper Green River

I was at the end of my rope, (it was a stressful day in the office) Woody and Shane showed up and wanted to go kayaking….with a new toy.

I hadn’t paddled the Coupe on whitewater, so we decided to take it to the Upper section of the Green River and see how it did. At first I was thinking I should wear knee pads or a butt pad….a sit on top on the Upper Green? Surely I was going for a few swims. I was shocked at how stable the boat was! I couldn’t have flipped it over if I tried. ;)

We ran all the rapids we would have in decked kayaks, and I had no issues with feeling top heavy like I usually do in a sit on top. Even running the drop at Bayless Boof. The Coupe came through well. If I had the LL thigh straps I could see running it down good class 2 and 3 confidently.


There’s a great wave towards the beginning of the river, but nobody surfs on it because it’s above a tricky spot, "Wanda's". Once the boat was surfing, I couldn’t get it off the wave! It handled it soo easily. I never felt like I was out of control. After surfing, I thought for sure I would be in for it…the next rapid was just a few yards below. The Coupe turned so much faster than expected, and I was able to line up for Wanda’s Hole with no problem.


After the first set of rapids, the river has a stretch that feels like a scenic float. Dropping the skeg was simple, and cruising along the flat water was effortless. I didn’t feel like I was fighting the weight or length of the boat. Shane hopped in for a surf at this great wave by the take out….I don’t know if it’s considered back surfing if all you do is swivel the seat around so you’re facing backwards? I can’t wait to take this fishing on the lower section of the Green.


Its exciting….a sit on top that can surf, run rapids, won’t flip over, is easy to paddle, and actually has mechanical parts that are easy to use! We’re excited to get them in the outpost at Green River Adventures when they arrive. So many of our local clients live on the lakes surrounding the Green. So, they want a boat that can be fun on the lake, in moving water, and on whitewater….it’s the first of it’s kind. A do it all kind of boat.

If thats what you are looking for you should check it out.
Sarah


Here is a slideshow of more shots and a video of the day.
Cheers
Shane

Wednesday, January 13, 2010

Liquidlogic Security Bars: The part of the story you may not know.


That's right, an entire story about security bars.
You got two choices you can get the whole story about security bars by reading and checking out the photos or you can watch this video. They are pretty much the same. One you just look at parts and pieces. The other you have to listen to me yap.


I got into this because we just did a series of tests on our security bars, the attachment point of the bars, and the bolts that we use to screw them on to the boat. Often both paddlers and manufacturers overlook this component, but like everything on our boats, we've given the grab bars some serious love. Lots of people take it for granted that the "security bars" on a kayak are strong and can take a ton of pull and punishment but in fact I have heard lots of stories about groups pulling bars and handles off of kayaks in rescue or boat recovery situations. In a boat recovery its a bummer because you potentially ruin a boat but if you are trying to help unpin a person the failure of this system is a much more serious matter.


The Liquidlogic security bar is made of 7000 series aircraft grade aluminum (that's aluminium for your foreigners) so you can fly it if you want to. Using that material allows it to be light and strong obviously. During our testing we only had one bar break and that was made by an old supplier of ours. The rest of the bars made it past 2000 lbs.


The bolt that we use to tie the security bar down to the boat is a stainless steel bolt so that it won't rust but it is also rated to a similar strength to the other parts of the system. Choosing the right bolt doesn't prove easy in this situation, either. Too soft and you strip the threads and heads, too hard and the head will pop off under serious pull. We've found a bolt rated to the strength that will match that of the bars, inserts, plastic, and throw ropes for optimum reliability.


These are the inserts that we mold into our boats. They used for attaching the bars. Each insert is held in the mold during the molding process by a pin. As the plastic flows through the mold it also coats and flows around the inserts, bonding them to the boat. The perforated part is encased in plastic and the threads are left exposed for use in attaching parts.


This is an insert much like the ones that other companies use. Enough said.


Here is our insert in the mold.


This is what the insert looks like once it is molded into the boat. This view is looking inside the kayak, under where the bar would be attached. The big deal with this insert is the size. You can see how big the surface area is and how the plastic has molded in, and around the insert. Its like having a stronger anchor to the whole system. This insert is rated a little over what the bars are rated for pull strength. You can look inside your boat and see the inserts, where they are placed, and what they hold on top of the boat. Notice the size of the insert in your boat. Its big indicator of the pull strength.


This is what the insert looks like from the outside of the boat. The threads are exposed for screwing into and you can just barely see the plastic that molds around the insert that keeps it from leaking. Now the fun part. I have pictures of things just about to break but the video has some slow motion of breaking things.


Here is a test we did on half a boat. Look how far the bar is bent and it still hasn't broken.


This test was probably the most dangerous of them all. At 2200 lbs the head of the bolt sheared off and shot around like a bullet. Fortunately everyone in the plant was wearing bullet proof shielding and of course safety glasses. It looked like this.


I hope you enjoyed this mundane article about a part of the boat that most people don't think about.
Cheers
Shane




Tuesday, January 05, 2010

The Liquidlogic Coupe Series: Sit On Top Kayaks

The Coupe 10 and The Deuce Coupe 13

Its been nearly a year since we started working on the Coupe Series, two all-around Sit On Top kayaks that are versatile enough to be paddled in the lake, on the river, and at the beach. We have done several prototypes of each and taken the Coupes to all different types of watery environments for play that we call beta testing. We have also put them in the hands of all types of paddlers. Everyone from complete paddling beginners to grizzled veterans have jumped in the Coupes, but probably the most fun thing to see was how kids just love to play around in these multi-talented cruisers.

The girls having a great afternoon in the Coupe 10


Woody and Andy hanging out at the Lake in the Deuce Coupe


Sarah taking it out on whitewater

The idea for the development of these boats was to use the success of the Remix XP concept,
and design a sit on top kayak with the same versatile features. The Coupe series has the same simple retractable skeg system as the XP, a similar hull design with stability and ease of use as the main features, and comfort as the thing that keeps you coming back to this kayak.

The hull design on the Coupes is one that allows anyone to handle the boat easily on the water.
It has a fairly flat hull that gives it the ability to turn easily and it makes for a very stable boat. We set two channels deeply into the hull to alleviate stress on the scuppers, help with tracking, and create a stiffer hull. With the skeg up it spins on a dime so that you can maneuver in tight areas or spin quickly to catch a wave. If you drop the skeg down it tracks easily. Even an absolute beginner can paddle the Coupe straight. The bow sweeps up for climbing over swells in the ocean, or running rapids in the river and the soft rounded sidewalls give the Coupe Series an easy-to-paddle, stable, confident ride.
It surfs river waves!

You can't tip the thing over!

It surfs ocean waves!


After spending so much time working on, paddling, and watching others paddle this boat I was able to see many of the things that make a good sit on top or not. We put a lot of time and creative energy into the features of the Coupes.

  • The molded in seat offers comfort even without using one of the three other seating options we offer.
  • The skeg is simple, easy-to-use, and bomber.
  • The molded-in footbraces are comfortable for all size paddlers.
  • There is ample storage in the back of the boat as well as personal dry storage for each paddler.
  • The molded-in handle in the back and luggage handle in the front provide strong comfortable grips to handle the boat.
  • The Coupes come with a paddle holder that hold the paddle solidly in place.
  • There are lots of good cup holders for any type of beverage you would like to take.
  • (these were tested thoroughly by our R&D team)
  • The Coupes stack perfectly for storage in the Garage or in the Store.
  • We put in extra large scuppers for a couple reasons, they are much stronger, and drain the water very quickly.
  • You can also use the large scuppers and molded-in handle as an easy lock up point.
We have also developed a few accessories to go with the Coupes.
  • Three different seat accessory options including Bad Ass Outfitting.
  • Thigh straps for added control.
  • Storage areas are designed to work with several of our Water Trail cooler and storage bags.
  • And my personal favorite accessory: a wheel for the back of the boat for easy one-person transport even on the Deuce Coupe.


It'll go where ever you want to go

The Coupes have been shipping the last month and are shipping all over the world so check'em out!


Here's a bunch of shots from the past year in the Coupes


For more info go to the Coupe pages on the Liquidlogic website.
Here are the links.
Click Here For The Coupe 10
Click Here For The Deuce Coupe

Cheers
Shane

Shaneslogic Comments